

Introduction
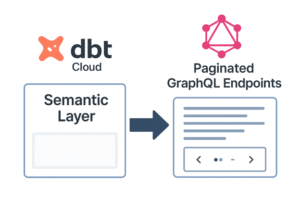
The dbt Semantic Layer, combined with paginated GraphQL endpoints, creates a bridge between governed data models and flexible API access. Instead of repeatedly writing SQL or duplicating business logic, teams can expose standardized metrics that are instantly consumable in tools like Postman or Power BI.
With pagination support, even large datasets can be explored efficiently while maintaining both performance and governance. This approach ensures faster access to insights while keeping data consistent and reliable across tools.
Set Up dbt Cloud and Snowflake
Step 1: Create a dbt Cloud Account
- Sign up using: Email address, Full name, Password, Organization name.
- Click Create Account and You’ll be logged into dbt Cloud
Step 2: Create a Project
- After logging in, click “New Project,” enter a name (e.g., my_dbt_project), and click “Create Project.”
Step 3: Configure Development Environment
- Go to the “Environments” tab in your project, locate the default Development environment,click”Edit”.
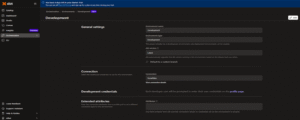
- You will configure the Snowflake connection in the next step.
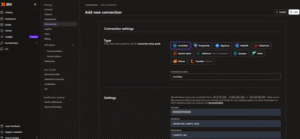
Step 4: Add New Connection (Snowflake) & Test It
- Under Connection, select Snowflake as the adapter, fill in the required fields (account, user, password, warehouse, database, schema).
- Click Test Connection to validate; if successful (green message appears), click Save to apply.
In this project, Snowflake was connected using a public dataset:
Database: SNOWFLAKE_SAMPLE_DATA
Schema: TPCH_SF1
Table: CUSTOMER — this table was used throughout the project for all demonstrations.

Step 5: Set Up a Repository (Git Integration)
dbt Cloud needs a Git repo to track your project files:
- Under Environment → Repository, click Add Repository, choose your Git provider, authorize access, enter your repo name, and click Create to complete the setup.
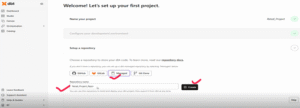
- After clicking Create, you’ll be redirected to a confirmation page—this indicates your project is now successfully configured with both Snowflake and your Git repository.
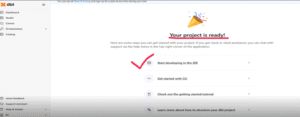
Step 6: Initialize the dbt Project
- Click Start Developing in the IDE, then select Initialize dbt Project to begin.
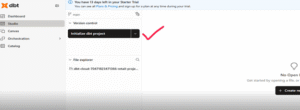
- You’ll then be redirected to a page where dbt automatically sets up the default project structure with folders like models and dbt_project.yml.
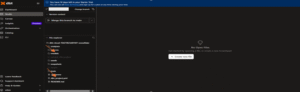
- After setup, edit files in the browser IDE and use Commit & Sync to push changes to your Git repo.
Before building models and metrics, we first load customer data from the Snowflake Sample Data into our own Snowflake environment under a custom database and schema. With the data in place, we define models, YAML sources, and metrics—laying the foundation for a centralized dbt Semantic Layer that powers consistent analytics across BI tools.
Build Models and Metrics
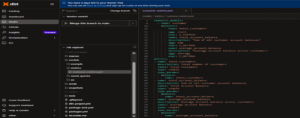
Step 7: Create Models and Define Sources & Metrics
In the File Explorer, under models/, create two folders:
- src/ → add the following files:
- customer.sql
- customer_schema.yml
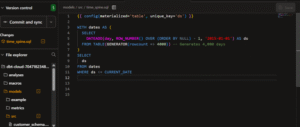
- time_spine.sql
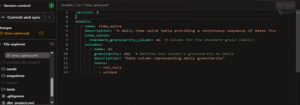
- time_spine.yml
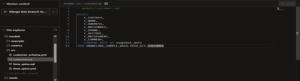
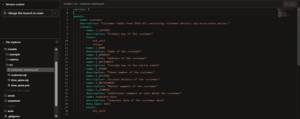
- metrics/ → add: customer_metrics.yml
Step 8: Save and Commit Changes
Click Commit and sync, add a commit message like “added source models and customer metric”, then confirm to push your changes.
Step 9: Run and Validate Your Models in dbt Cloud
- Run dbt run in the IDE to execute your models, sources, and tests, then validate the results in Run History and explore your assets in the Documentation tab.
Step 10: Create a Production Job to Build Models
- Go to the Orchestration tab, navigate to Jobs, and click Create Job -> Deploy Job
- Fill in Job Configuration
- Set the Job Name (e.g., dbtjob2), choose your Production Environment, and add the dbt commands under Execute Steps.
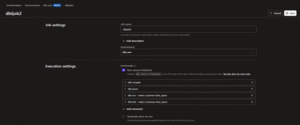
- Save and Run the Job
- Click Save Job, then on the job run page, click Run Now to start your first manual run.
- Monitor the Job Run
o Monitor logs in real-time to track each step (e.g., dbt deps, dbt run) and review the outcome to address any failures.
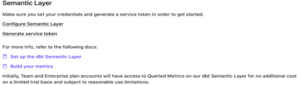
Enable the dbt Semantic Layer
Step 11: Set up dbt Semantic Layer
Select environment
- Select the environment where you want the Semantic Layer to be enabled.
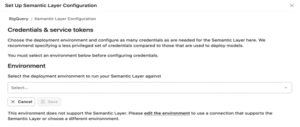
- Go to Account Settings from the main navigation panel.
- Under the Settings section, click on Projects and choose the project where you want to configure the Semantic Layer.
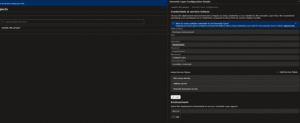
- On the Set Up Semantic Layer Configuration page, choose your preferred deployment environment and click Save to activate the Semantic Layer in that environment.
Step 12: Configure Credentials & Create Tokens for dbt Semantic Layer
- Choose Deployment Environment
- Go to Environments > Credentials & Service Tokens in your dbt Cloud project.
- Click on “Add Semantic Layer Credential”.
- Add Credentials
- Enter credentials from your data platform (e.g., Snowflake).
- Use read-only access to schemas containing dbt models.
- Create & Link Service Token
- After adding the credential, create a service token.
- Link the token to the credential.
- Use this token for authenticating downstream tools (like Tableau, Power BI, or Postman).
Step 13: Verify Semantic Layer Configuration
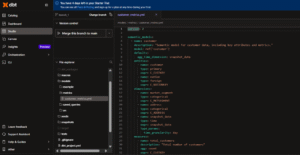
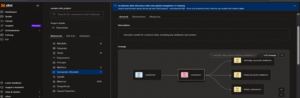
- Navigate to Catalog → Resources and select a Semantic Model.
- In the right-hand panel, check if key metrics(like total_customers, average_account_balance, etc.) are visible.
- Ensure all expected metrics are listed correctly for that model.
Paginated GraphQL Endpoints
You can integrate GraphQL paginated endpoints of the dbt Semantic Layer using tools like Postman or other GraphQL clients. In our case, we are using Postman to test and validate the integration.
Step 14: Install Postman (Windows)
- Download the 64-bit Postman installer from postman.com/downloads.
- Run the installer, complete the setup wizard, and launch Postman to confirm it’s installed.
Step 15: Initial Postman Setup for dbt Semantic Layer
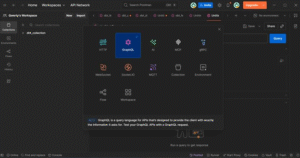
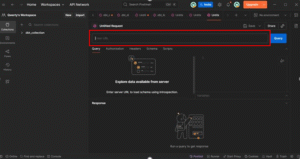
- Open Postman and click + New to create a new request.
- Then, select GraphQL Request to begin setup.
Step 16: Accessing Semantic GraphQL API URL in dbt Cloud
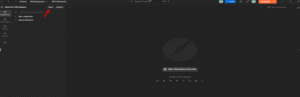
- Log in to dbt Cloud, go to Account Settings → Account, and copy the Semantic GraphQL API URL under Access URLs.
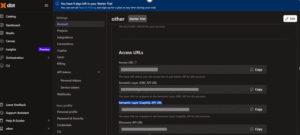
- Paste the copied URL into the Request URL field in Postman (GraphQL client).
Step 17: Authorization Setup
In Postman, open the Authorization tab, choose Bearer Token, paste your Service Token, and ensure it has Semantic Layer Only and Metadata Only permissions.

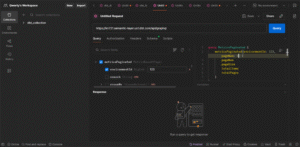
Step 18: Define and Customize the Query
Go to the Query tab in Postman, let it auto-generate the query, then modify parameters like metrics Paginated by replacing any null placeholders with actual values.
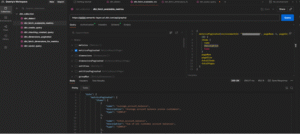
Step 19: Run a Query and View Results
Click the Query button next to the Request URL, then view the results in the Response Body section.
Step 20: Save Queries for Reuse
After sending the request, click Save, add it to a collection (e.g., dbt Semantic Layer), and reuse it to test other endpoints like dimensionsPaginated or entitiesPaginated.

Conclusion
Bringing together dbt’s Semantic Layer and GraphQL endpoints provides a streamlined way to serve analytics-ready data. Pagination ensures queries remain fast and scalable, while consistent metrics eliminate the risk of reporting mismatches across tools. This integration ultimately transforms data access into a reliable, reusable service—empowering teams to deliver insights faster and with greater confidence.