
Overview
This blog shows how to connect Google Gemini, n8n, and Snowflake to turn plain chat requests into SQL queries. With MCP as a secure bridge, the system separates AI intent from query execution, making it modular, scalable, and safe.
The workflow also improves testing, security, and maintainability, while reducing manual SQL effort. By the end, you’ll see how this setup makes data access faster, smarter, and more user-friendly.
Introduction
Writing SQL can be slow and technical, especially for non-experts. This setup solves that by using Gemini for natural language, n8n for automation, and Snowflake for execution.
MCP ensures secure and structured communication between AI and the database. Users can ask questions in plain language and get clean results instantly. The approach is ideal for teams that want scalable, low-code data access without compromising security.
Prerequisites
Before you start, have the following ready:
- n8n account
- Snowflake account
- Google Gemini API credentials in your n8n instance
- Basic SQL knowledge
What is MCP (Model Context Protocol)?
MCP (Model Context Protocol) is the pattern we used to let the AI agent request external tools safely and in a structured way. In your n8n build:
- MCP Client (in AI workflow) — asks for a “tool” to be invoked.
- MCP Server Trigger (in sub-workflow) — listens for MCP calls and runs the requested tool (the Snowflake query pipeline)
- The Client/Server separation lets the AI focus on intent while the server enforces access, validation and executes SQL
Think of MCP here as a bridge and contract between the model and your data systems.
What is n8n?
n8n is an open-source workflow automation tool that lets you connect different applications, services, and databases without writing complex code.
It works like a visual editor where you can drag and drop nodes to build workflows. Each node represents an action (like sending an email, running SQL, calling an API, or processing data).
Think of n8n as a bridge between all your tools — you define the logic, and n8n handles the automation.
Key Features of n8n
- Open-Source & Flexible – Run it on cloud or self-host, with full control and customization.
- Visual Workflow Builder – Drag-and-drop interface to automate tasks without heavy coding.
- Rich Integrations – 350+ ready-to-use nodes for apps, APIs, and databases like Snowflake, Slack, and Gmail.
- Hybrid No-Code/Low-Code – Combine prebuilt nodes with custom JavaScript for advanced logic.
- Secure & Scalable – Manage credentials safely and scale workflows from simple tasks to enterprise automation
How to Sign Up for n8n
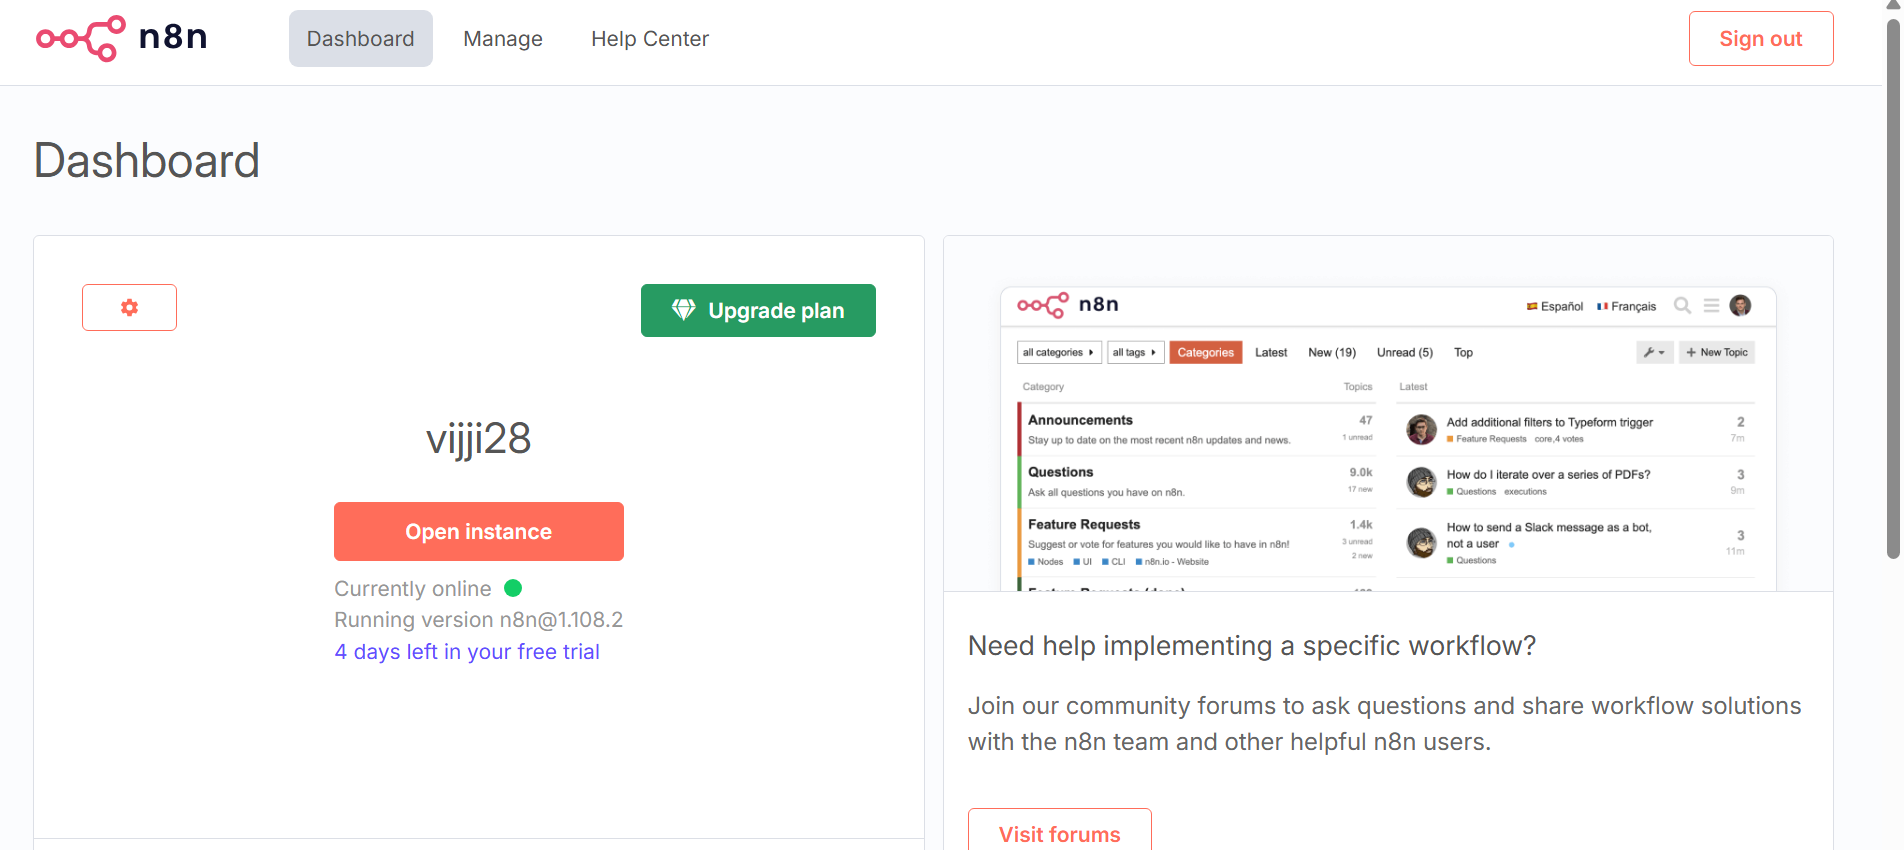
Getting started with n8n is simple and quick. I am using n8n Cloud (hosted by the n8n team)
- Visit n8n.io and click on Get Started
- Enter your email address and create a password.
- Verify your email to activate your account.
- Once logged in, you’ll land on the n8n dashboard, where you can start building workflows right away.
Architecture Overview
The integration runs on two connected workflows in n8n: a Main Workflow that handles chat interactions and a Retrieve Data Sub-Workflow for database queries. Together, they form a seamless pipeline where AI intelligence meets database orchestration.
Main Workflow: AI Agent and Tool Orchestration
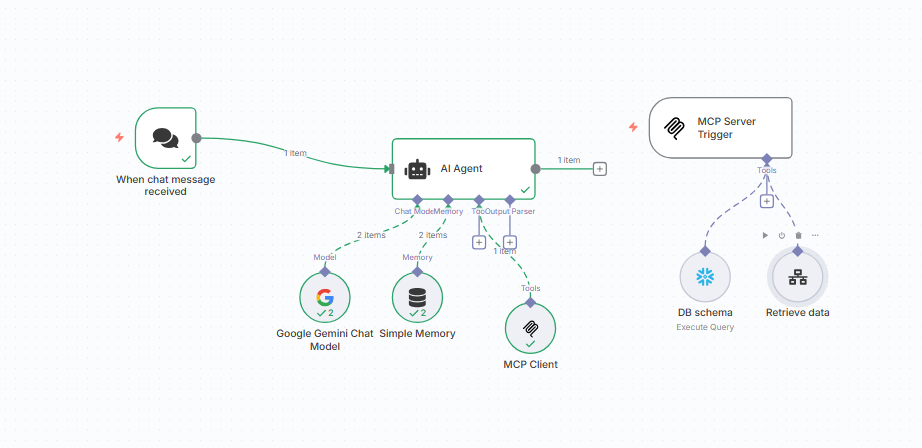
The Main Workflow kicks in when a new chat message arrives. It uses the Google Gemini 2.0 Chat Model to process queries, remember past conversations, and decide whether database access is required.
Key components include:
- Trigger Node – Starts the workflow when a chat message is received.
- AI Agent Node – Powered by Gemini with conversation memory and tool parsing.
- Database Tools – Fetch schema via MCP client
- Retrieve Data Tool – Invokes the sub-workflow to fetch and process query results.
This design ensures that if a user’s query needs database access, the AI dynamically routes the request to the right tool and integrates the results into its response.
Retrieve Data Sub-Workflow: Optimized Query Execution

The Sub-Workflow focuses solely on executing queries safely and efficiently:
- Trigger Node – Accepts SQL and parameters from the Main Workflow.
- Code Node – Validates and formats queries for Snowflake.
- Snowflake Node – Establishes a secure connection to Snowflake and executes queries
- Aggregate Node – Collects and transforms results.
- Conditional Logic – Ensures result sets stay below 100 rows to avoid overload.
- Return Node – Sends cleaned JSON output back to the Main Workflow.
Error handling is built in, so invalid queries or connection issues are caught and reported without breaking the flow.
Implementation Steps
Build the Main Workflow:
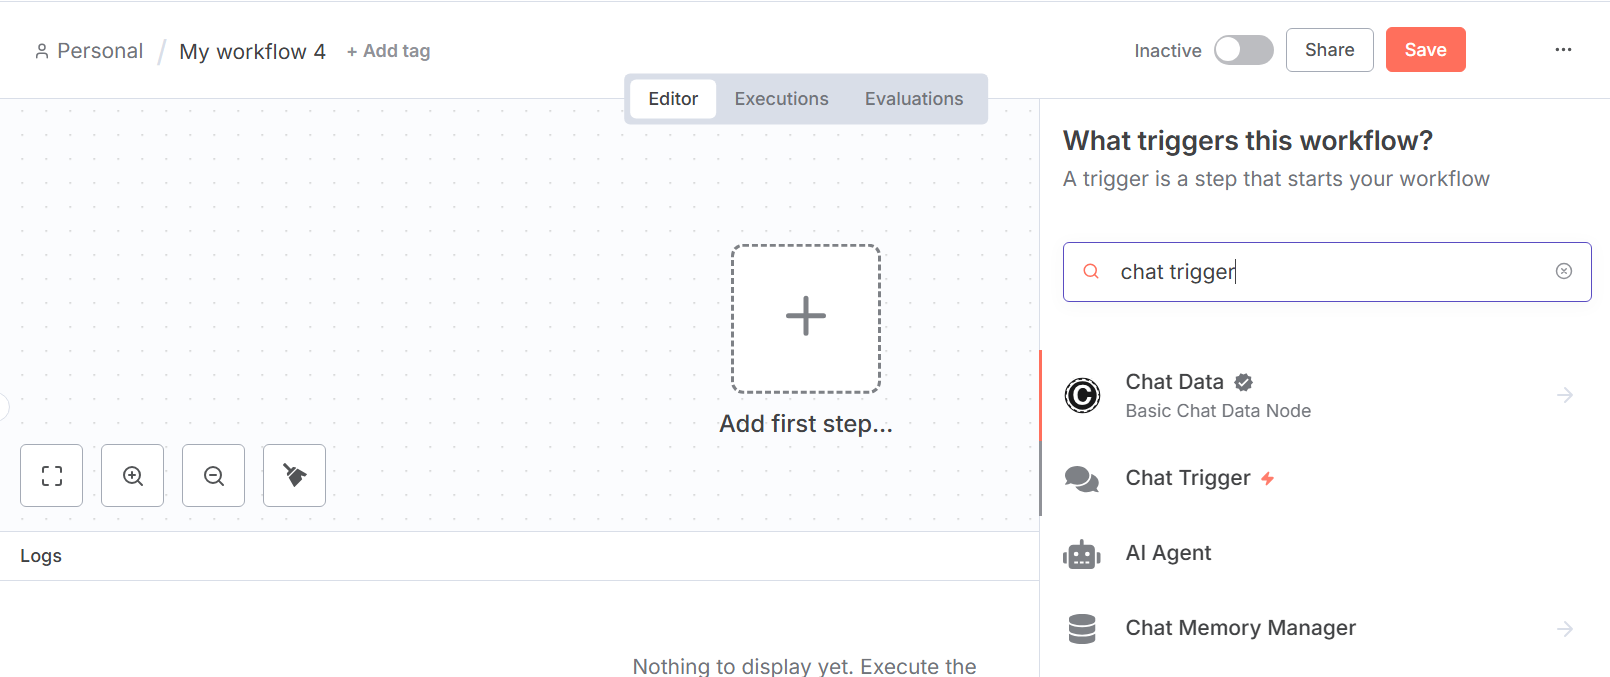
1. Create a New Workflow
- Log in to your n8n dashboard.
- Click + New Workflow

2. Add the chat trigger node by clicking the + icon present on the right side of the canvas and search for the chat trigger node which acts as the entry point for user queries.

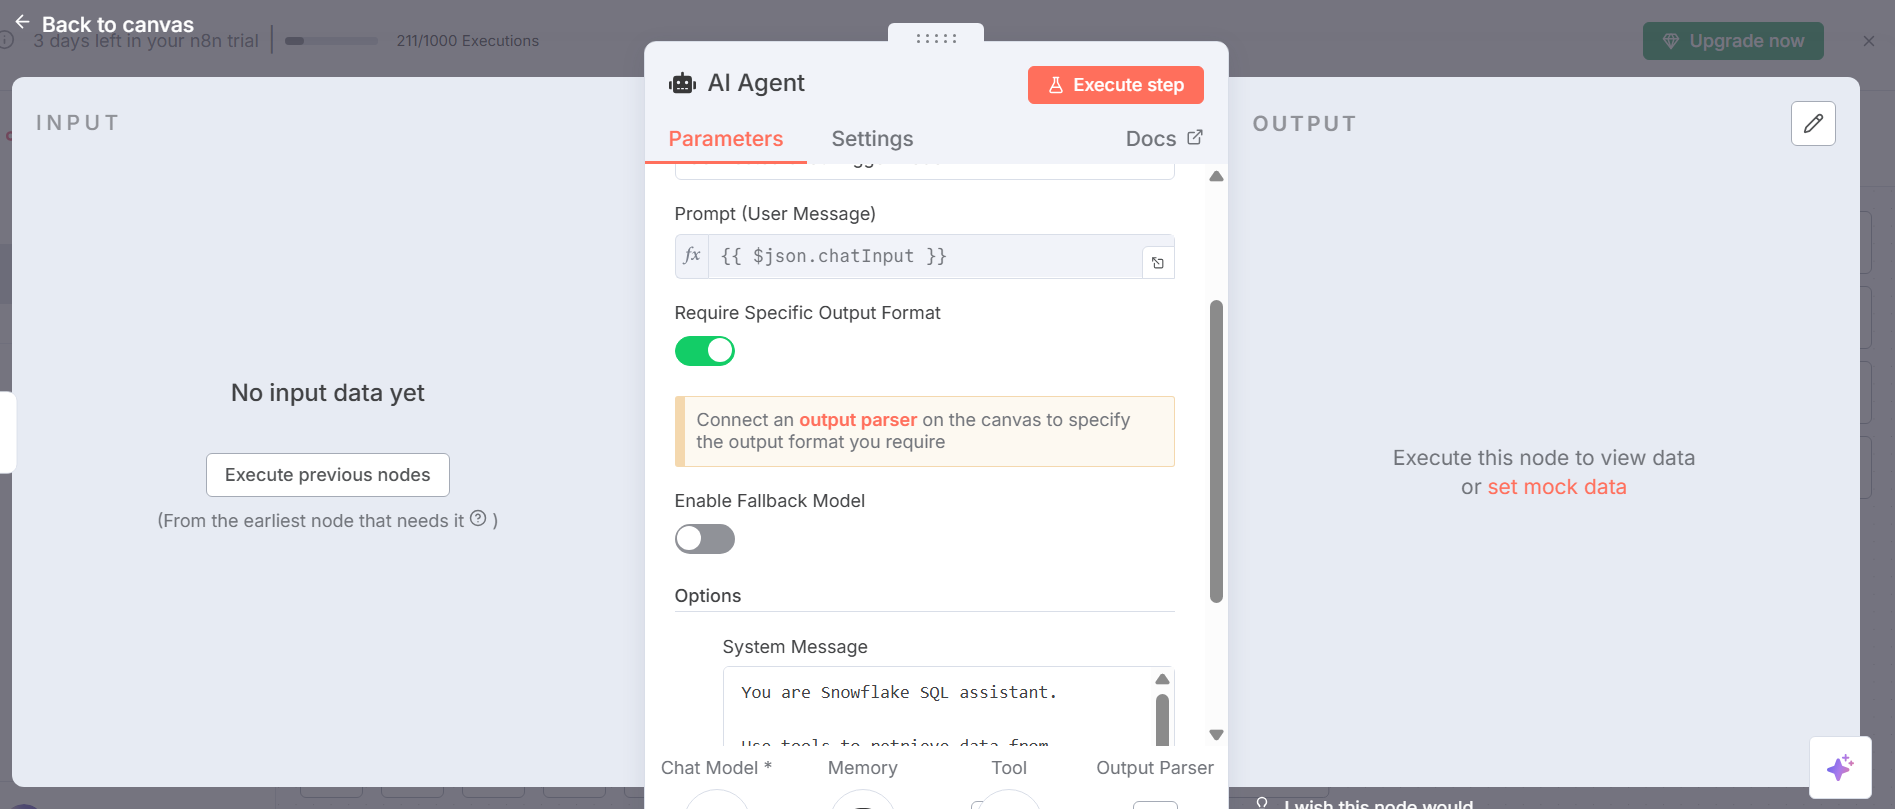
3. Set Up the AI Agent Node
- Add an AI Agent Node and connect it to the trigger.
- Inside the AI Agent configuration:
- Select Google Gemini Chat Model as the model.
- Add Simple Memory (stores in n8n memory, no credentials are required) to the Memory so the bot can remember previous conversations.
- Add a System Message to guide the AI’s behaviour.
4. Configure Google Gemini Chat Model
- Drag in the Google Gemini Chat Model Node and connect it under Model in the AI Agent.
- Go to Google AI Studio and generate an API Key.
- Click on pencil icon in Credential to connect with and add API key
- In the node configuration, select Gemini 2.0 Flash as the model

5. Integrate MCP Client for Database Tools
- Drag in the MCP Client Node and connect it under Tools in the AI Agent.
- In the MCP Client configuration, add the production URL of your MCP Server in the Endpoint field.
- You can find this URL by placing the MCP Server Node on the canvas and checking its settings

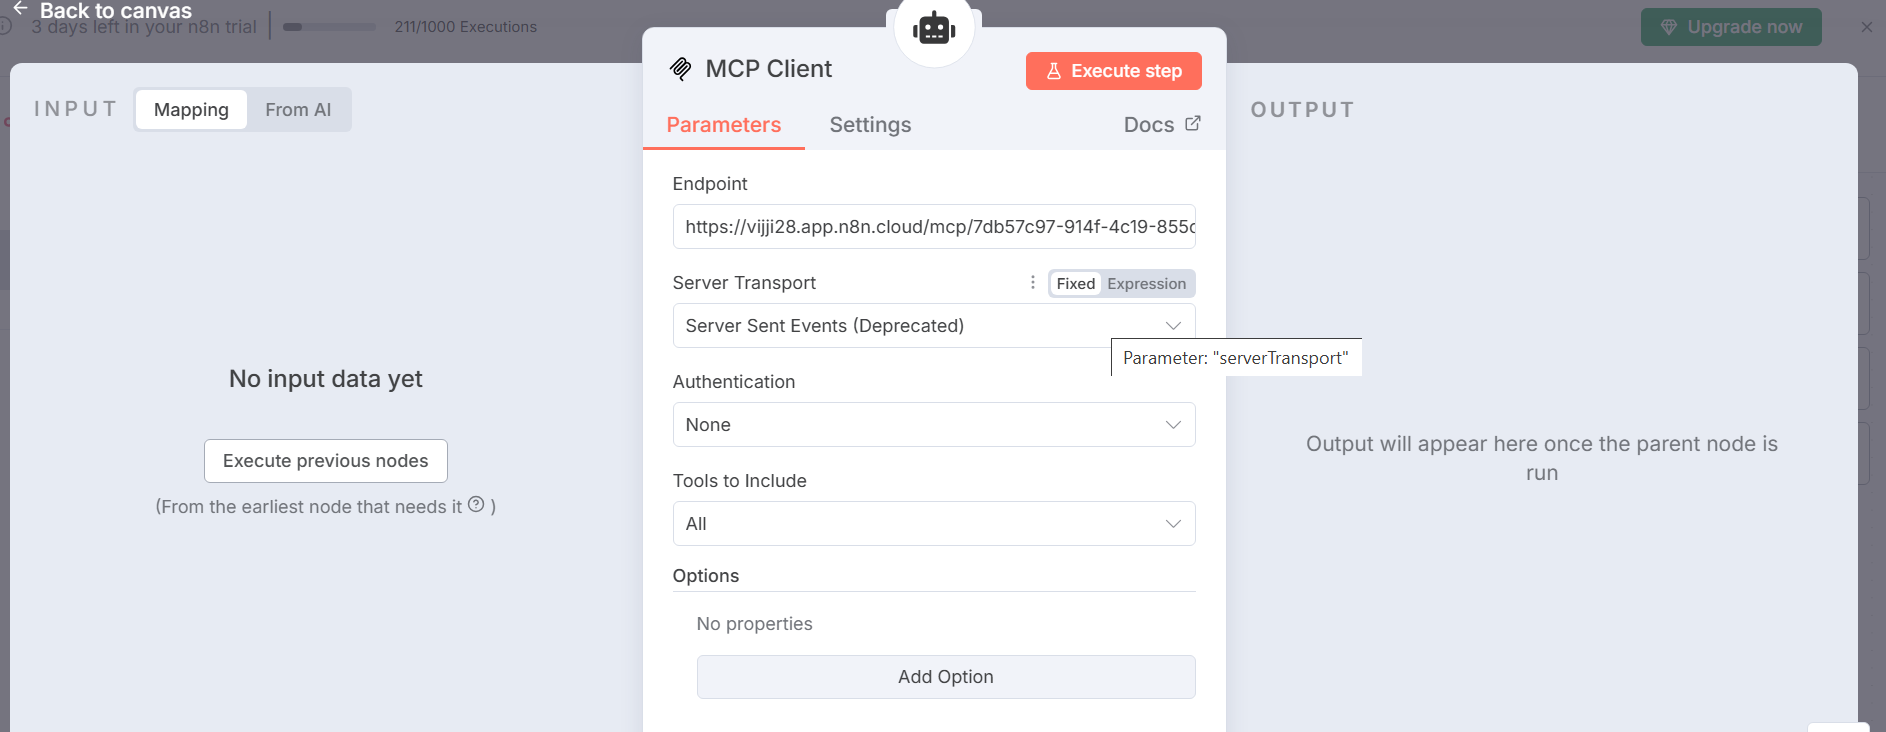
This setup ensures the AI Agent can securely communicate with the MCP Server for Snowflake operations.
- In this workflow, two tools are integrated:
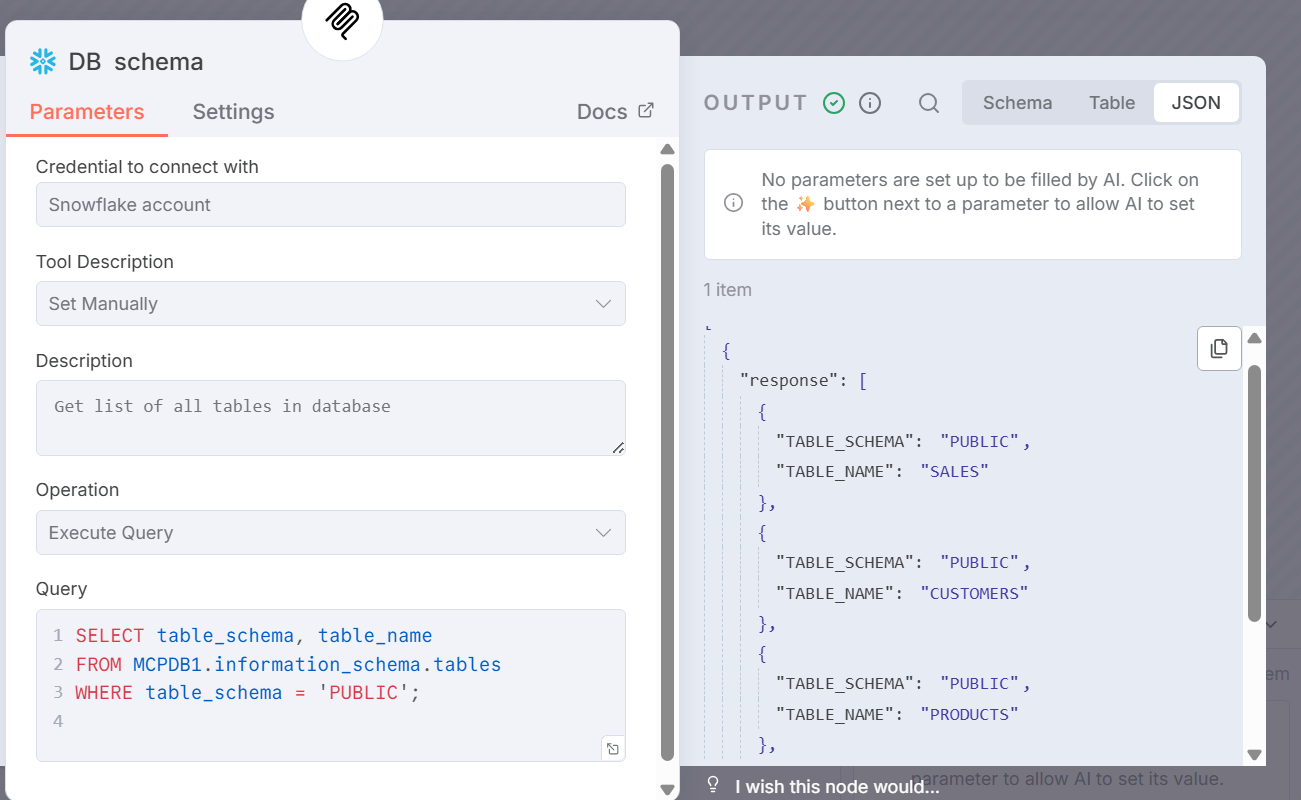
- DB Schema Tool → Retrieves schema metadata from Snowflake.
- Retrieve Data Tool (Sub-Workflow) → Executes SQL queries in a separate workflow and returns the processed results.
6. Connect MCP Server Trigger
- Add the MCP Server Trigger Node.
- This node securely manages requests between the AI Agent and Snowflake.
7. Attach Snowflake Tools
- Under the MCP Trigger, attach:
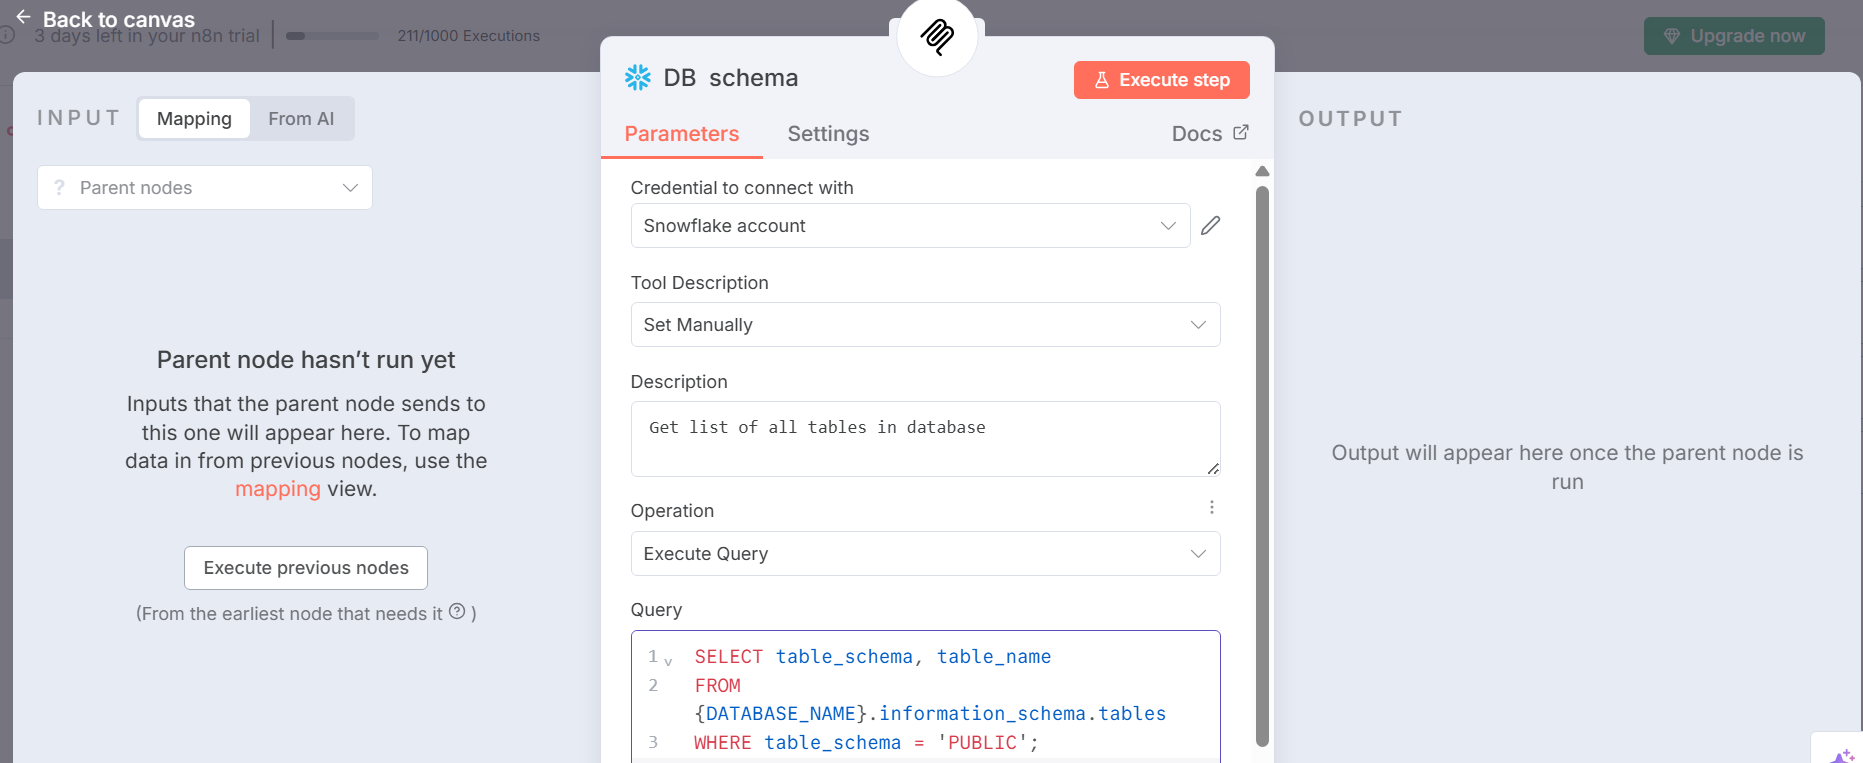
- DB Schema Node → to fetch database metadata.
- Retrieve Data Node (Sub-Workflow) → for executing queries and returning results.
- To Configure Snowflake tool
- Click on pencil icon and click Create a new credential
- Fill the required details: Account Name, Username and password, Warehouse, Database, Schema and Role
- Select Execute the query as operation
- Save and test the connection.
- Keep your database in the place holder in below query
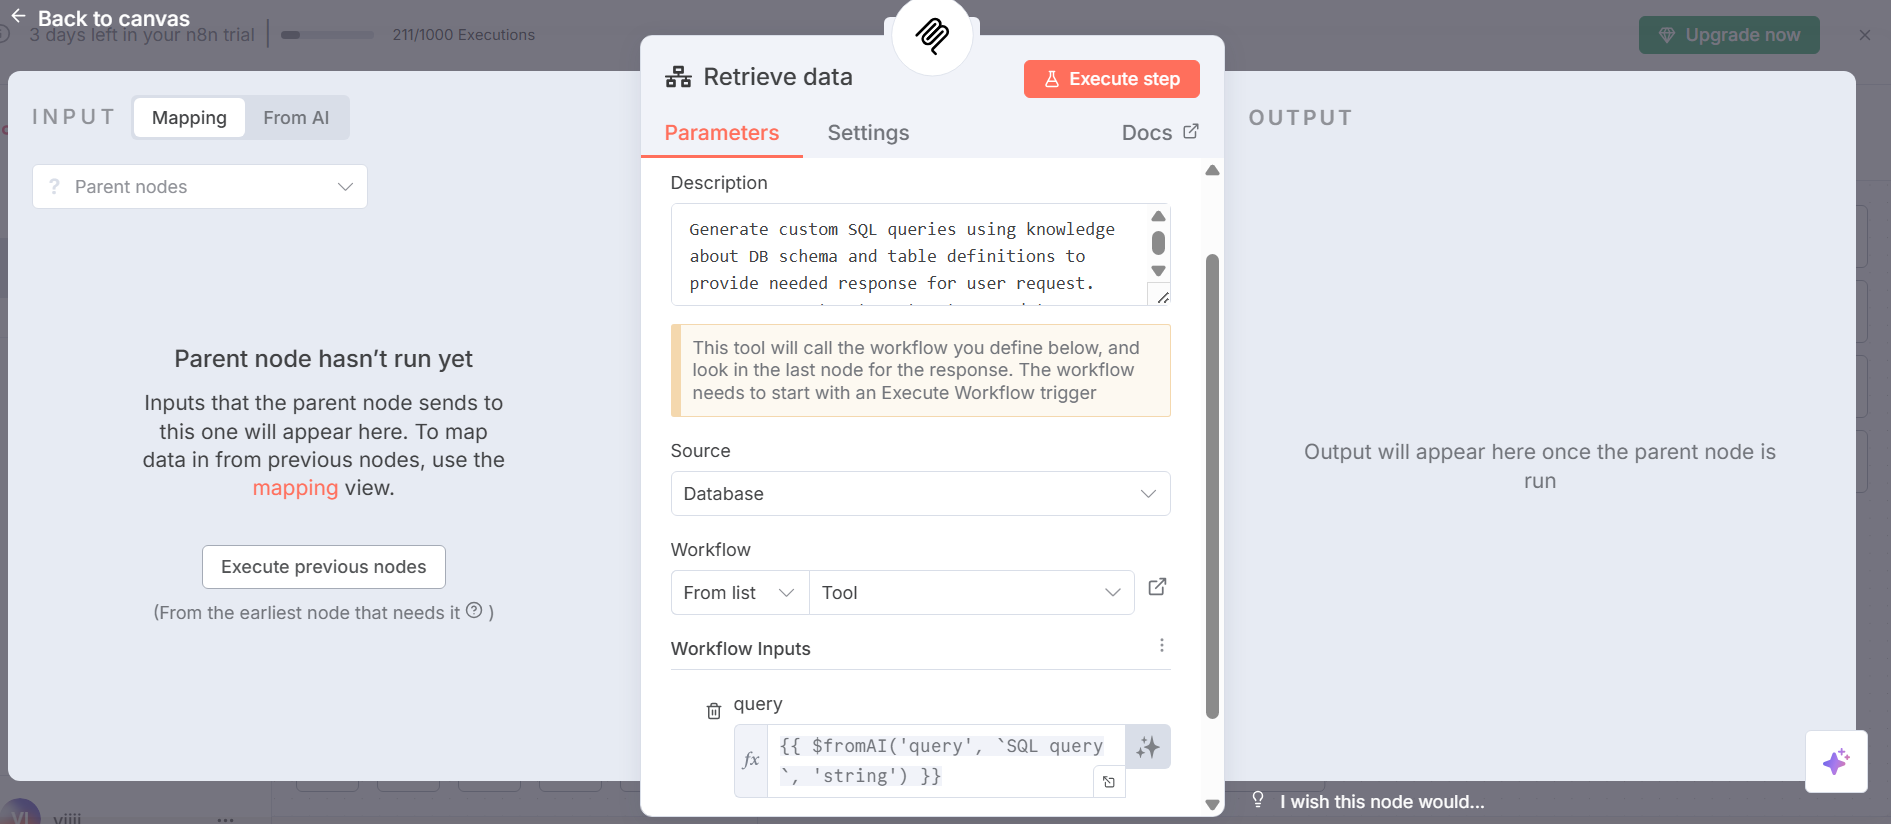
- In Retrieve Data (call n8n workflow tool)
- Under Workflow, select the sub-workflow that contains your query logic. This sub-workflow should start with an Execute Workflow trigger.
- In Workflow inputs to send add this expression {{$fromAI(‘query’, `SQL query`, ‘string’)}}.
- This ensures that the SQL query generated dynamically can be executed in Snowflake.
Retrieve Data Sub-Workflow
- Click + New Workflow
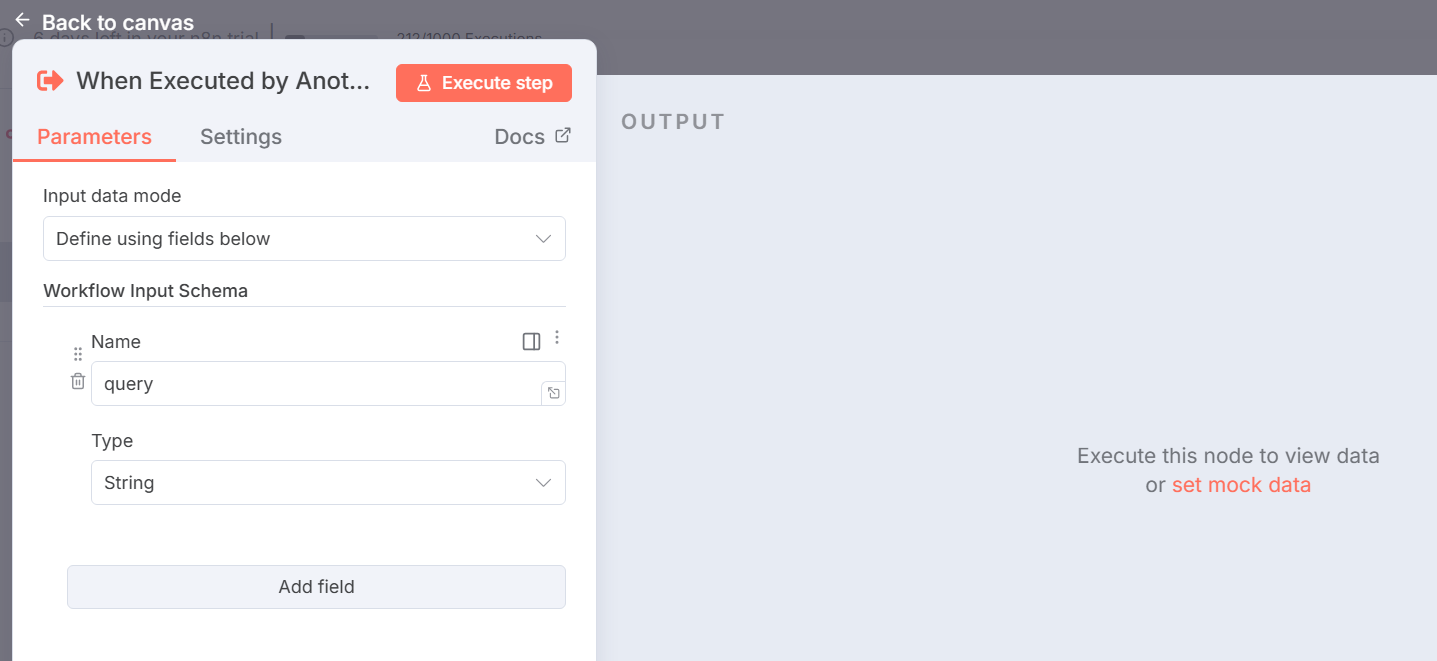
- Drag the Execute Workflow trigger node onto the canvas, labelled “When Executed by Another Workflow
- Under Workflow Input Schema add field name “query” and select “string” as type
- This defines the input as a string parameter, expected to contain the SQL query generated by the AI Agent in the Main Workflow.
- Add a Code node and connect it to the trigger.
- Set mode to Run Once for Each Item to evaluate each input item separately.
- The code checks if the query field in the input JSON is missing or empty, throws an error (” No SQL query received from AI”) if true, and returns the JSON if valid.

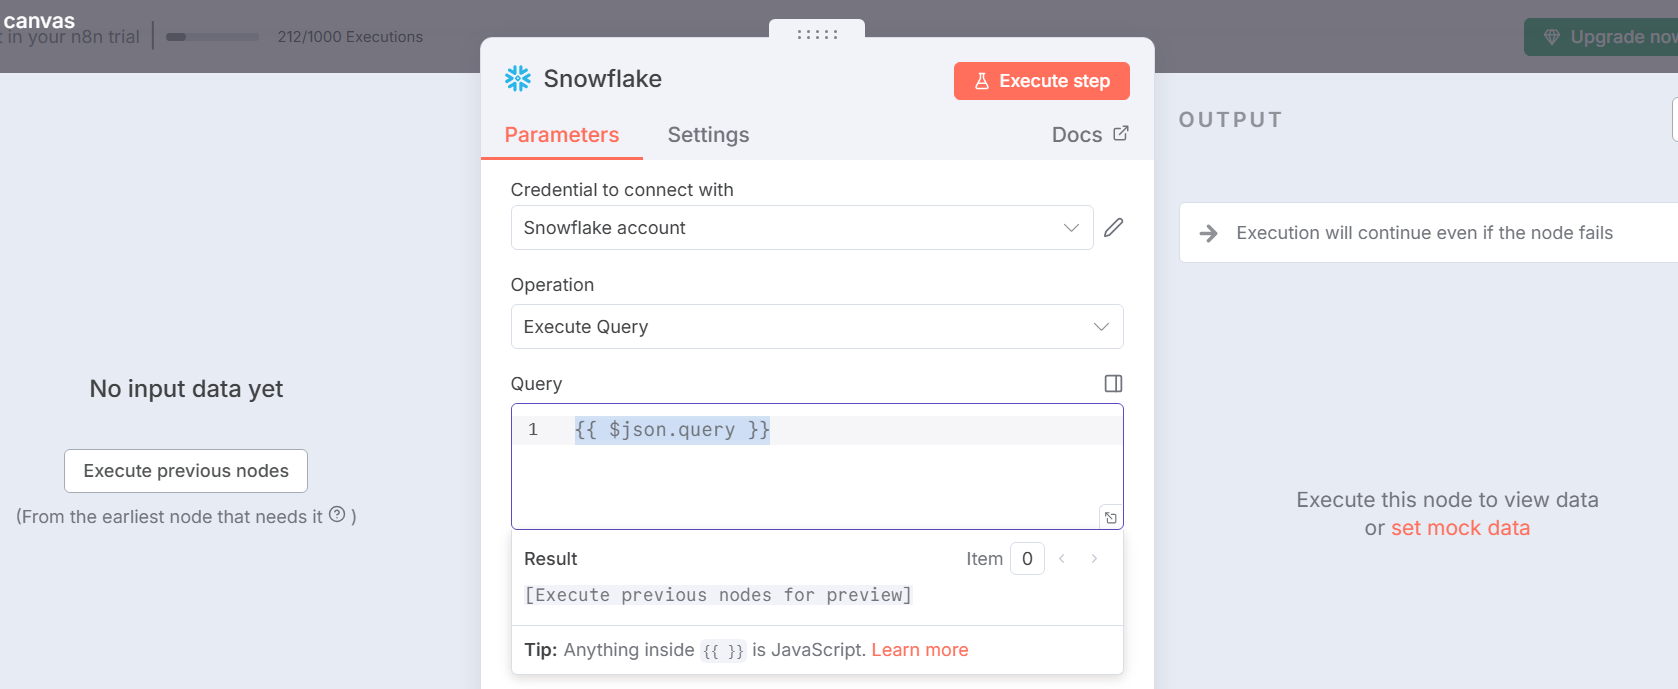
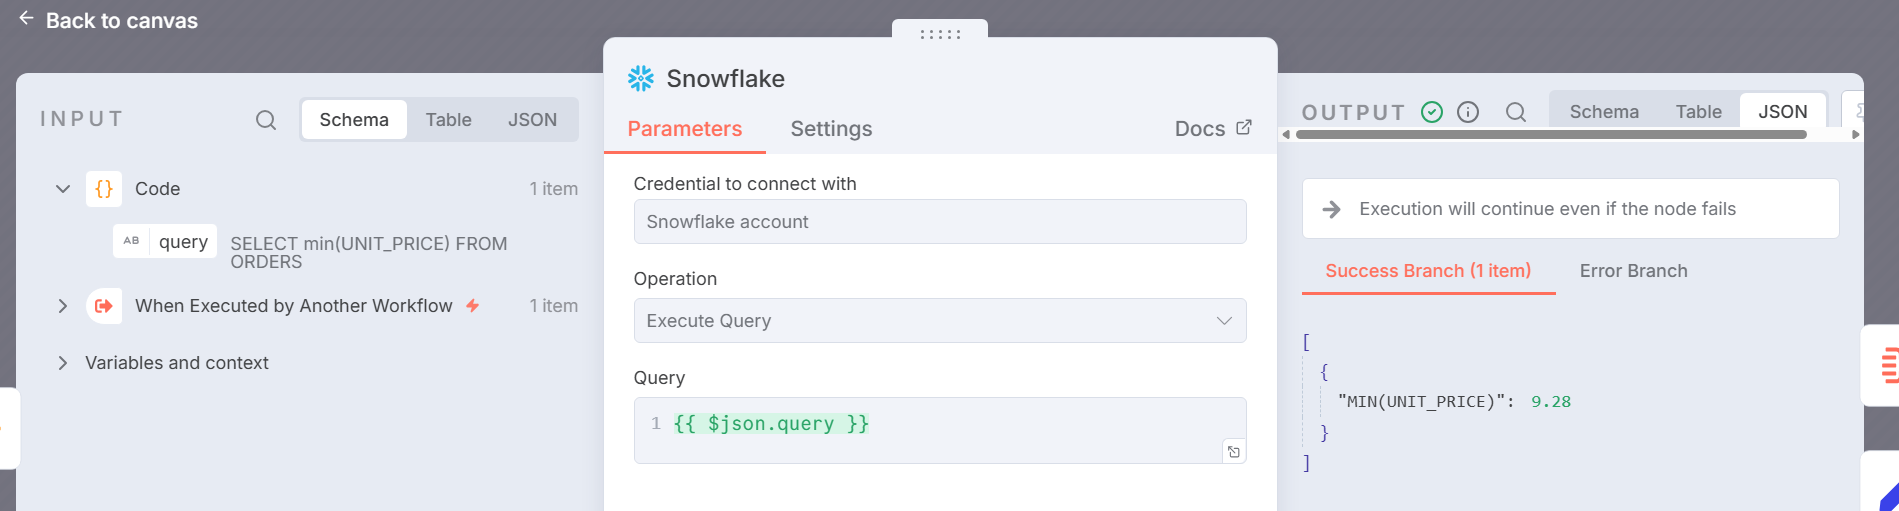
- Drag the Snowflake node and connect it to the Code node.
- Select “Execute Query” as the operation.
- Set the query field to {{ $json.query }} for dynamic execution.
- In settings, enable Continue using Error Output: This setting allows the workflow to proceed along the error path when a query fails (e.g., due to syntax errors or database issues)
- Outputs: Connect the Success Output to the Aggregate node to process successful query results, and the Error Output to a Set node (e.g., “return error (raw)”) to format and return error details.
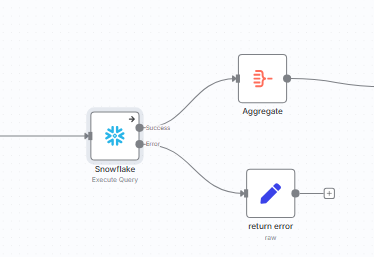
- The error output of snowflake node is attached to set node named “return error”
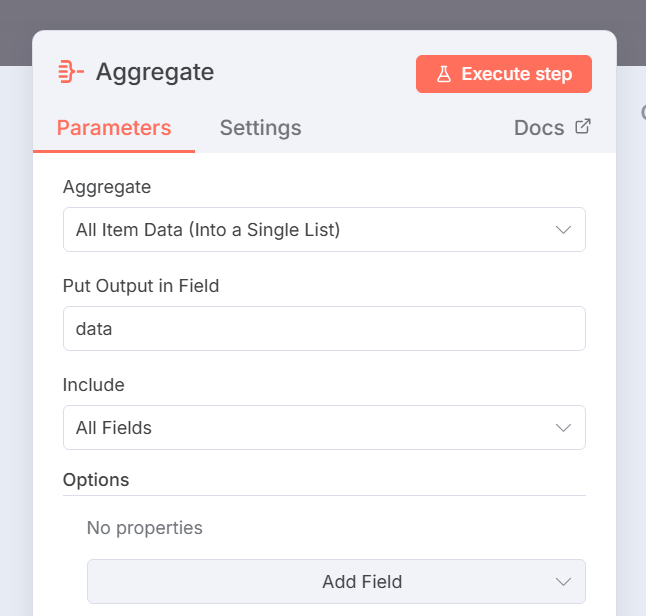
- Add an Aggregate node and connect it to the Snowflake Success output.
- Set Aggregate mode – All item data into single list these aggregates “All Items” to combine results into a single JSON array
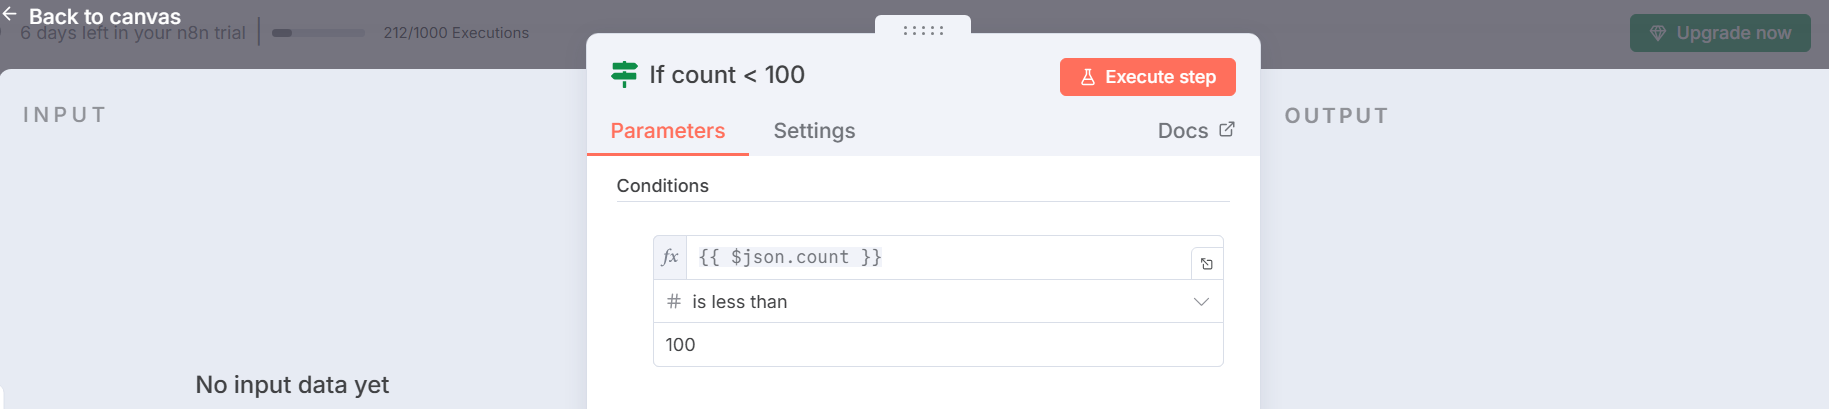
- Drag an IF node (labelled “If count >100”) and connect it to the Aggregate node.
- Add condition: {{ $json.count > 100 }} to check row count
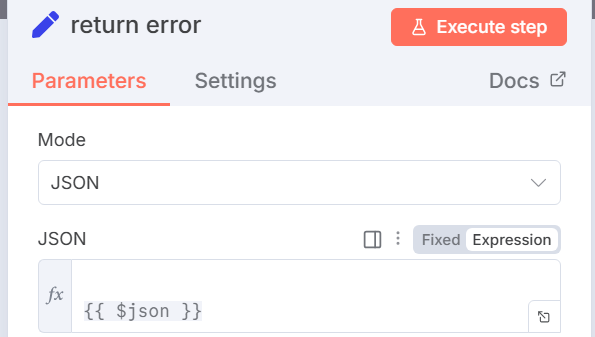
- False Branch: Connect to a “Set” node for successful return.
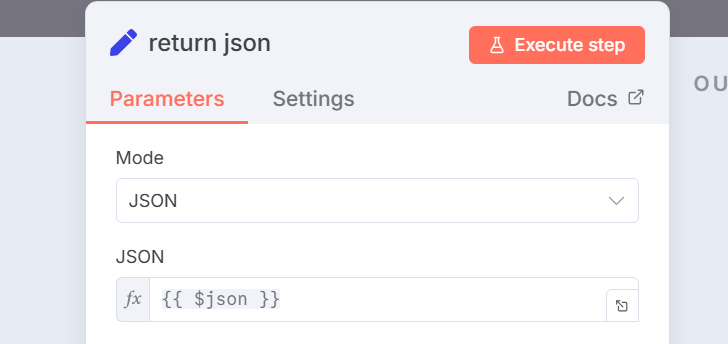
- Set node configuration for false branch
- Select JSON to define the output structure in JSON format.
- Enter the expression {{ $json }} to pass the aggregated query results directly from the previous node.
Execution Results
- For this setup, I created a Snowflake database called MCPDB1, which comes with a default PUBLIC schema. All user queries in this demo are executed against the PUBLIC schema within MCPDB1 to keep the workflow simple and consistent.
- Once both workflows are configured, you can trigger them by sending a chat request through the AI Agent. Below are sample execution outcomes:
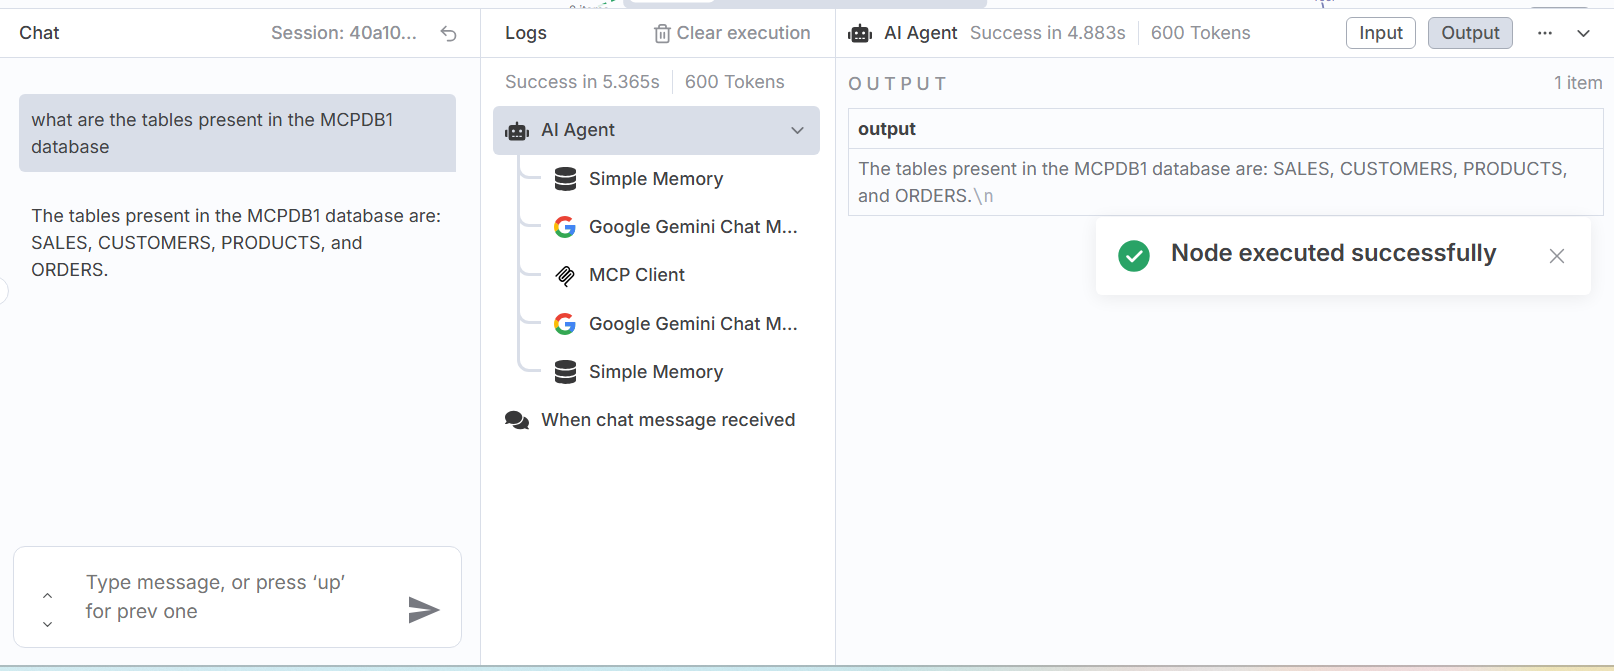
Query Execution 1:
- User Input (Chat):
- What are the tables present in the MCPDB1 database?
- AI Processing:
- During AI processing, the model generates a valid SQL query and automatically determines which tool its needs from the MCP Server through the MCP Client
- In this case, it uses the DB Schema Tool to fetch metadata from the MCPDB1.PUBLIC schema before executing the query
- Snowflake Execution:
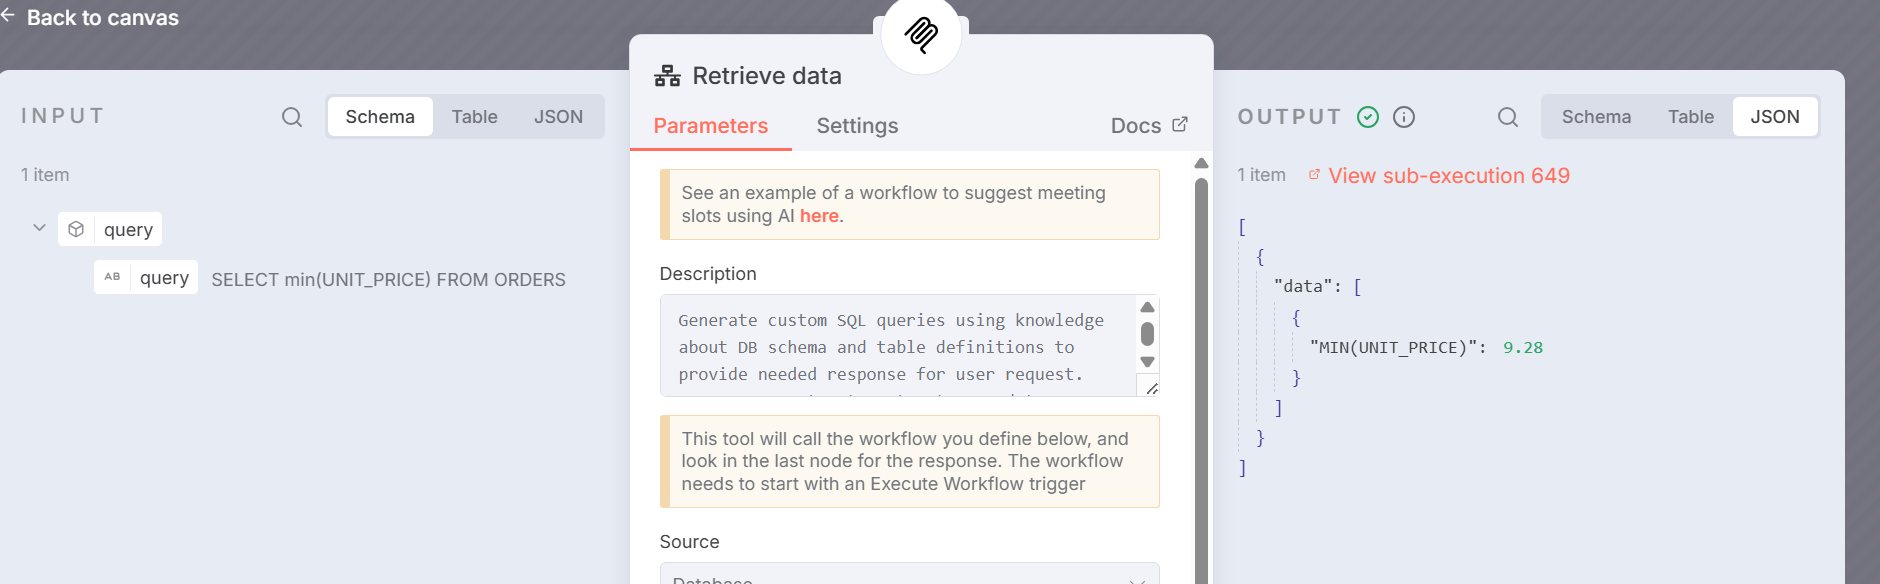
Query Execution 2:
- User Input (Chat):
- What is the minimum UNIT_PRICE in PRODUCTS table?
- AI Processing:
- During AI processing, the model generates a valid SQL query and automatically determines which tool it needs from the MCP Server through the MCP Client
- In this case, it uses the Retrieve Data to fetch the minimum UNIT_PRICE in PRODUCTS table
Below is the snowflake in sub-workflow execution
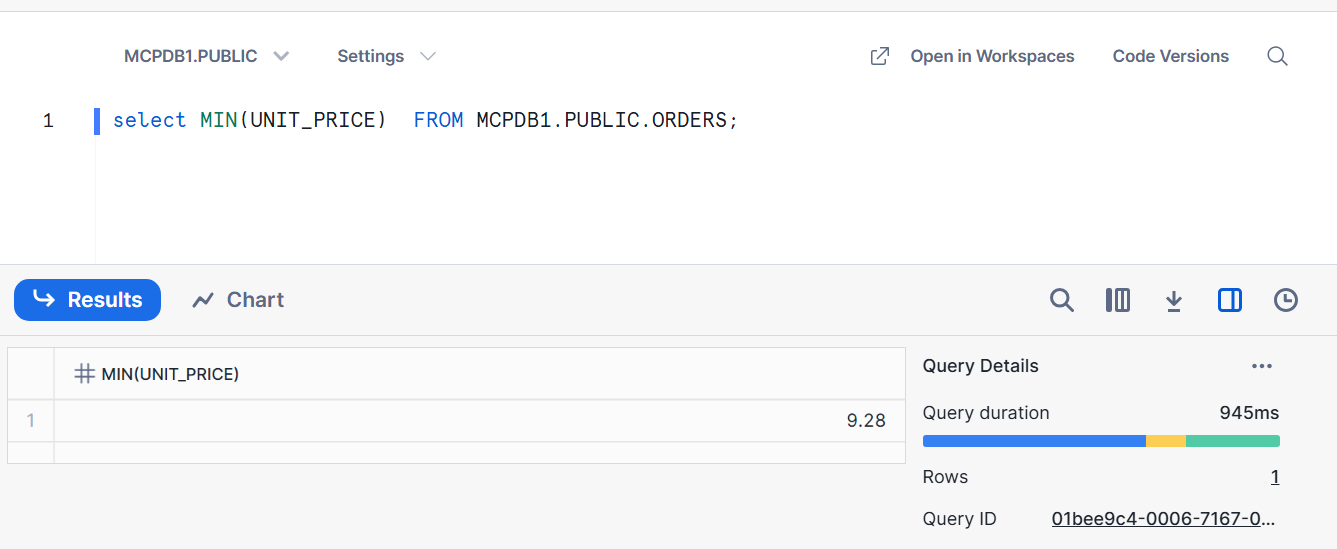
For Accuracy I checked in Snowflake as well. Below is the output:
Conclusion
This setup combines n8n, Google Gemini, and Snowflake to turn plain chat requests into SQL queries and clean results. Using the MCP bridge, the AI handles intent while Snowflake securely executes queries. The separation of orchestration and execution makes the system modular, testable, and scalable. With this approach, users don’t need to write SQL—they can just ask questions in natural language. It’s a practical way to make database access faster, smarter, and more user-friendly.